Beginner’s Guide to Contouring | Luxyora
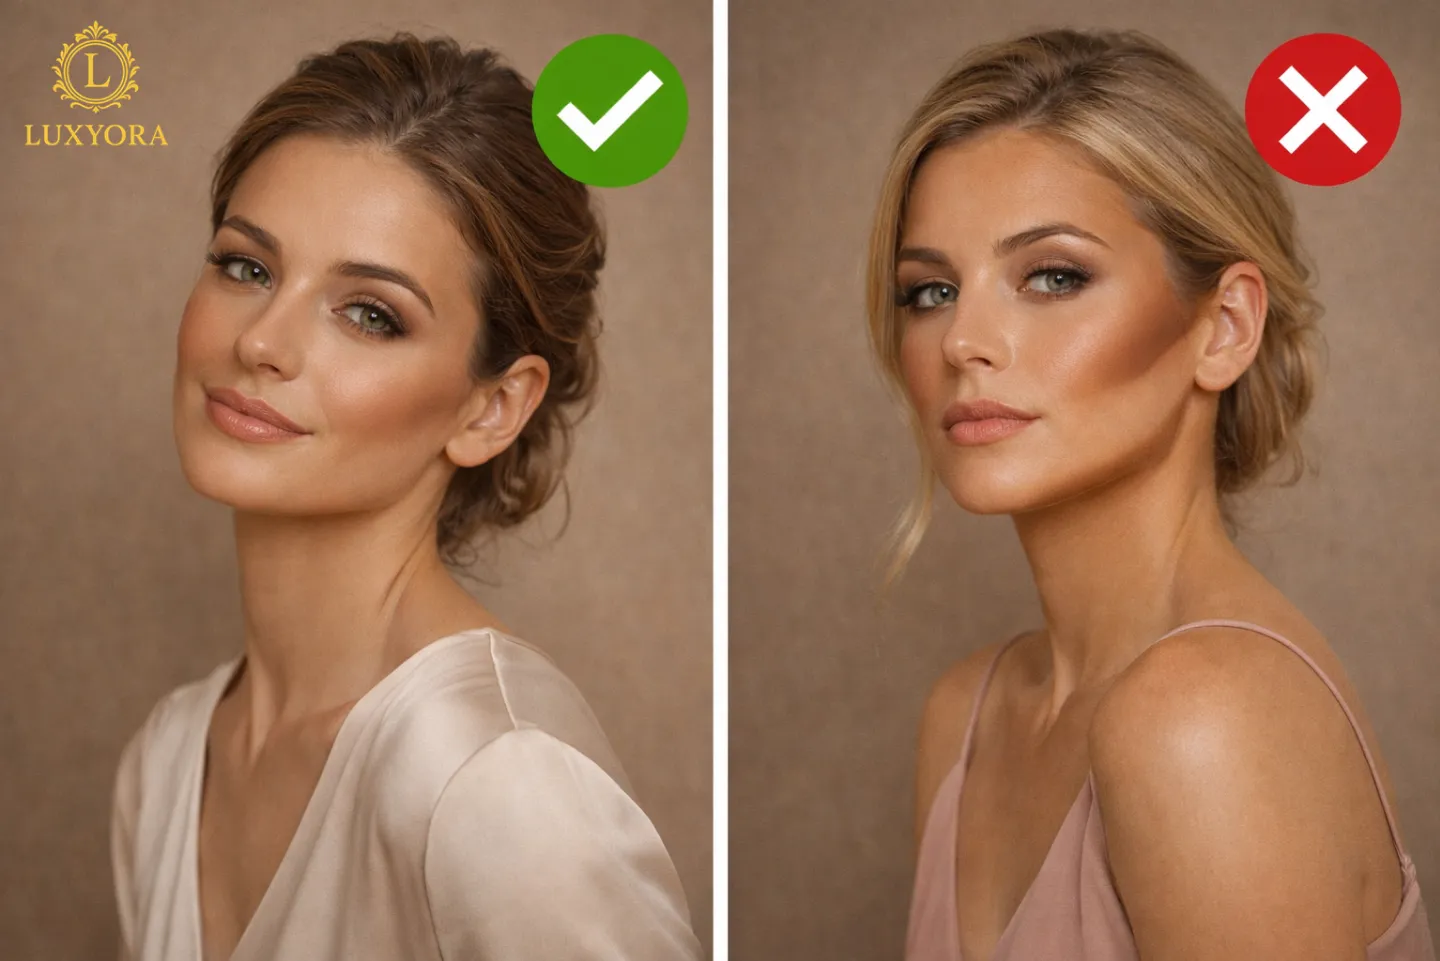
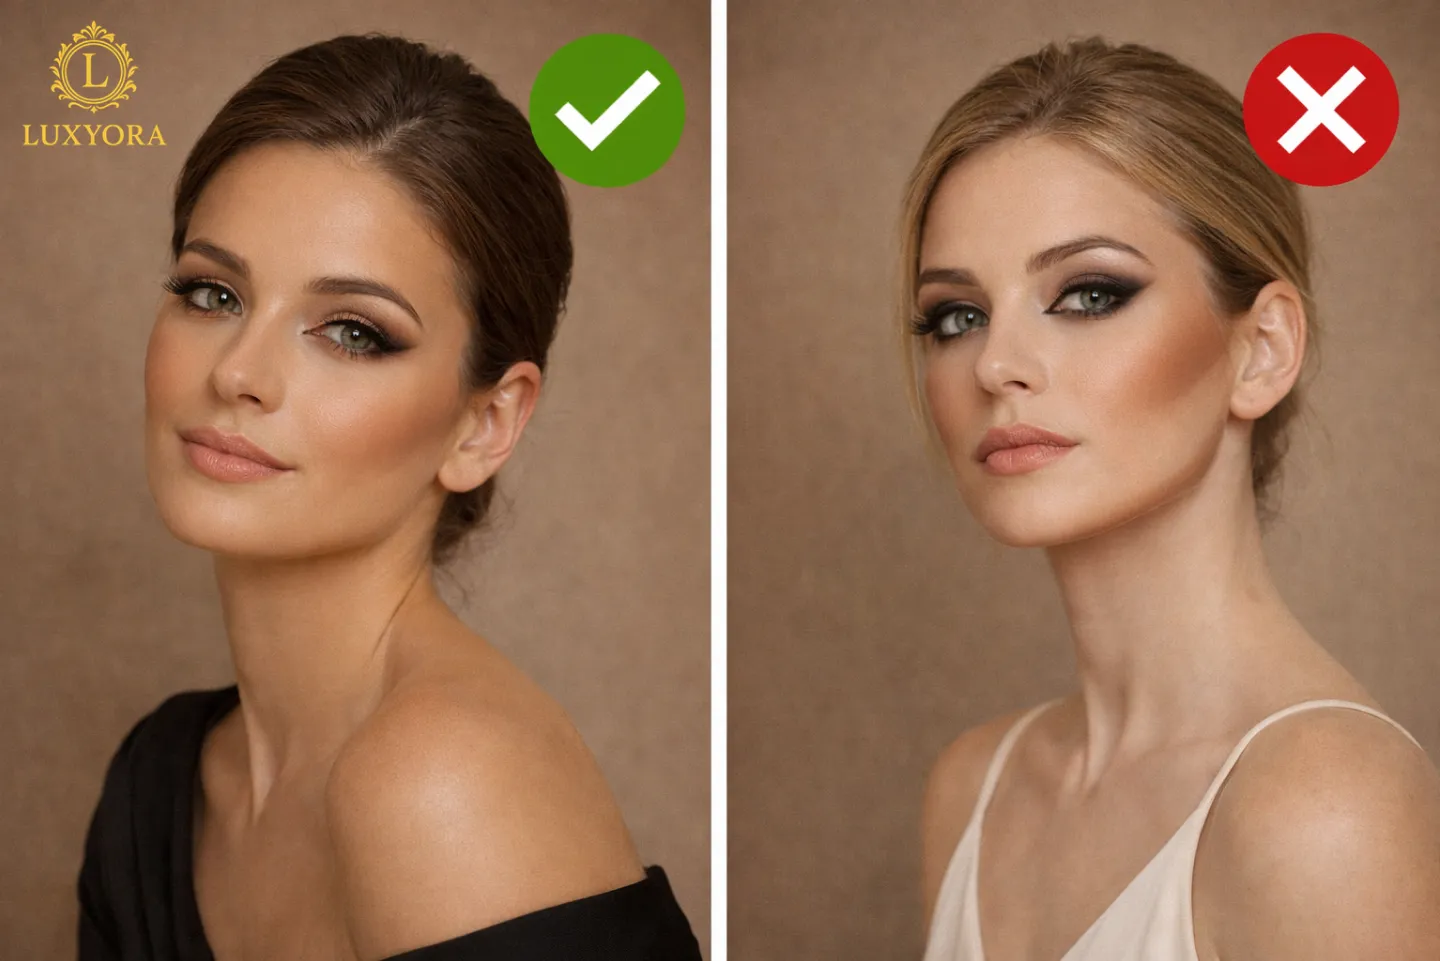
Contouring has a reputation: dramatic cheekbones, razor-sharp jawlines, and a certain 2016-era intensity that can feel… a lot. But in real life (and in excellent lighting), contouring is simply smart shadow placement, a soft, strategic way to bring out your bone structure and add dimension so your face doesn’t look “flat” once foundation and concealer have evened everything out.
The secret? Contouring is less about carving and more about whispering: subtle shadows, seamless blending, and tones that mimic natural depth. Let’s make it beginner-proof and still luxe.
What contouring actually is (and what it isn’t)
Contouring is the art of using darker, cooler-toned makeup to imitate the way shadows naturally fall on the face. It’s grounded in basic light-and-shadow principles used in makeup artistry.
It’s not bronzer (which adds warmth and “sun”), and it’s not meant to look obvious. If people can clock your contour from across the room, you’ve crossed into stage makeup territory, which can be fabulous, but not the everyday vibe most beginners want.
Step 1: Choose the Right Contour Product
Pick your finish based on your comfort level and skin type:
- Cream contour: More forgiving, more skin-like, easier to melt in. Great for dry to normal skin and beginners who like a dewy editorial finish.
- Powder contour: Easier to control when applied lightly, great for oily skin, and ideal if you’ve already set your base with powder.
Undertone matters more than you think.
A contour shade should generally be cool to neutral (think soft taupe, muted cocoa, cool beige-brown). Warm shades read as bronzer, pretty, but not shadow. Celebrity artist tips often emphasize choosing tones that won’t turn orange when blended.
Step 2: Get the Tools that Make Everything Look Expensive
You do not need a 20-brush wardrobe. You need the right brush.
- For creams: a dense buffing brush or damp sponge.
- For powders: a small, fluffy, angled brush or a soft contour brush that diffuses pigment.
A solid brush guide can genuinely change your results, especially when you’re switching between creams and powders (synthetic often performs better with creams).
Also, your fingers are allowed. Some pros even recommend fingers for creams because warmth helps the product blend into the skin more naturally.
Step 3: Learn the Placement Map (the Beginner-Friendly Way)
You’ve probably seen the “3 shape” or “E shape” contour map. It’s popular because it’s simple forehead/temple → cheek → jaw.
But for beginners, the most flattering method is to place contour only where you truly want more depth, then blend until it looks like it was never there.
Here’s the easiest placement guide:
1) Cheekbones (the main character)
- Find the hollow under your cheekbone (lightly suck in cheeks or feel the bone).
- Place the contour slightly higher than you think, not too low; a low contour can drag the face down.
- Keep it short: start near the ear and stop around mid-cheek.
2) Temples/forehead (optional, but gorgeous)
- Add a little contour near the temples to create soft dimension.
- Blend upward into the hairline so there’s no “helmet” effect.
3) Jawline (use with caution)
- A whisper of contour under the jaw can add definition.
- Blend down the neck slightly if needed, but keep it subtle; this area goes muddy quickly.
4) Nose (optional, advanced-ish)
If you’re brand new, skip the nose contour at first. Start once your cheek contour is effortless. When you do try it, keep lines faint, close together, and blend with a small brush so they look like natural shadows, not stripes.
Step 4: The Blending Rule that Separates “Pro” from “Paint”
Blending is not a step. It’s the whole game.
Try this order for the cleanest finish:
- Apply less product than you think you need.
- Blend upward on the cheeks (lifting effect).
- If you go too far, soften the edges with whatever’s left on your foundation brush or sponge, no extra product required.
If you’re working with powder contour, go in light layers. If you’re working with cream, press and bounce with a sponge to “stitch” the contour into the base.
Step 5: Contour by Face Shape (Quick Cheatsheet)
Want the most tailored effect? Adjust slightly based on your face shape.
- Round: keep cheek contour higher and slightly angled to lift.
- Square: soften jaw corners with gentle shadow near the back of the jaw.
- Heart: go lighter on the forehead; focus on cheeks and a touch under the jaw.
Long/oval: keep cheek contour more horizontal; avoid dragging it too far down.
Step 6: Common Contour Mistakes (and the Instant Fixes)
Mistake: Using bronzer as contour
Fix: switch to a cooler, taupe-leaning shade for shadow; keep bronzer separate for warmth.
Mistake: One thick stripe
Fix: blend edges first, then tap a tiny amount of foundation over the harsh line.
Mistake: Contour that looks “dirty”
Fix: you’re likely too warm, too dark, or too much. Choose a softer depth and build slowly.
Mistake: It disappears after the powder
Fix: set lightly, then reintroduce definition with a tiny amount of powder contour on top.
Step 7: The “Real-World Contour” Routine (5 Minutes)
If you want everyday sculpting more “polished” than “performed,” follow the real-life approach many artists recommend: keep it minimal, wearable, and buildable.
- Apply base (skin tint or foundation).
- Cream contour on cheeks + temples (light hand).
- Blend until seamless.
- Add blush (blush makes contour look intentional, not dull).
- Highlight lightly on high points (top of cheekbone, not too close to texture).
- Optional: set with powder, then add the softest powder contour for more definition.
And yes: check in daylight if you can. Your bathroom lighting has lied to all of us.
Luxyora Philosophy: Contouring isn’t about changing your face, it’s about revealing the architecture that’s already there. When you blend with intention, you don’t look “made up,” you look unmistakably, just beautifully defined.
References:
- Vogue. (2019, January 29). The ultimate makeup guide to contouring for different face types. (Vogue India)
- Vogue. (2019, May 11). Here’s a makeup guide to contouring for the real world (not Instagram). (Vogue India)
- Vogue. (2024). The beginner’s guide to makeup brushes for every task. (Vogue)
- Allure. (2018, October 27). How to contour and highlight your face with makeup. (Allure)
- Allure. (2020, April 23). Makeup artist Charlotte Tilbury answers readers’ most pressing makeup questions. (Allure)
- Allure. (2020). Makeup artist Charlotte Tilbury makes her winged eyeliner technique sound so easy—because it is. (Allure)
- Vogue. (2017). Watch Jordyn Woods’s easy 3-step guide to contouring. (Vogue)
- Allure. (2021, April 2). Makeup artist Patrick Ta is launching his first-ever contouring collection, and we tried it first. (Allure)
- Middleton, K. (2018). Color theory for the make-up artist: Understanding color and light for beauty and special effects. Routledge. (Vietchigo)